How To Build a Mining Rig: A Step-by-Step Guide for Beginners

Building a Cryptocurrency Mining Rig: A Comprehensive Guide
Cryptocurrency mining, the process of validating transactions and securing blockchain networks, has evolved significantly since Bitcoin's early days. While large-scale, industrial operations now dominate Proof-of-Work mining for major coins, many tech enthusiasts still find building their own mining rigs a rewarding endeavor. It offers a hands-on learning experience about blockchain technology, hardware interaction, and system optimization.
This guide provides a comprehensive walkthrough of building a cryptocurrency mining rig, focusing primarily on GPU-based mining suitable for various altcoins, while also touching upon ASIC mining for context. We'll cover component selection, assembly steps, software configuration, and crucial considerations like profitability and electricity costs.
Before You Build: Essential Considerations
Building a rig is exciting, but diving in without research can lead to disappointment or financial loss. Address these points first:
1. Profitability Reality Check
The most critical factor is potential profitability, which is highly uncertain for home miners. Key variables include:
- Electricity Cost: This is often the single largest operational expense and the primary determinant of profit or loss. Standard residential electricity rates usually make mining unprofitable.
- Hardware Cost & Efficiency: The upfront investment in GPUs or ASICs and their energy efficiency (how much hashing power they produce per watt) are crucial.
- Cryptocurrency Market Price: The value of the coin you mine fluctuates constantly (Crypto Volatility).
- Network Difficulty: As more miners join a network, its difficulty increases, meaning your hardware earns less crypto over time for the same effort.
Action: Before buying any parts, use online mining profitability calculators (search for specific coin calculators). Input realistic estimates for your chosen hardware's hashrate, its power consumption, your actual electricity cost per kWh, and potential pool fees. Remember these calculators provide estimates based on current conditions, which can change rapidly. For a deeper dive into Bitcoin-specific profitability, see Is Bitcoin Mining Still Profitable.
2. Electricity Costs: The Deciding Factor
Mining rigs are power-hungry. Multiple high-end GPUs or ASICs running 24/7 consume significant electricity.
- Calculate Your Cost: Estimate the total wattage of your planned rig (sum of components, especially GPUs/ASICs, plus a buffer) and multiply by your electricity rate per kWh to understand daily/monthly running costs.
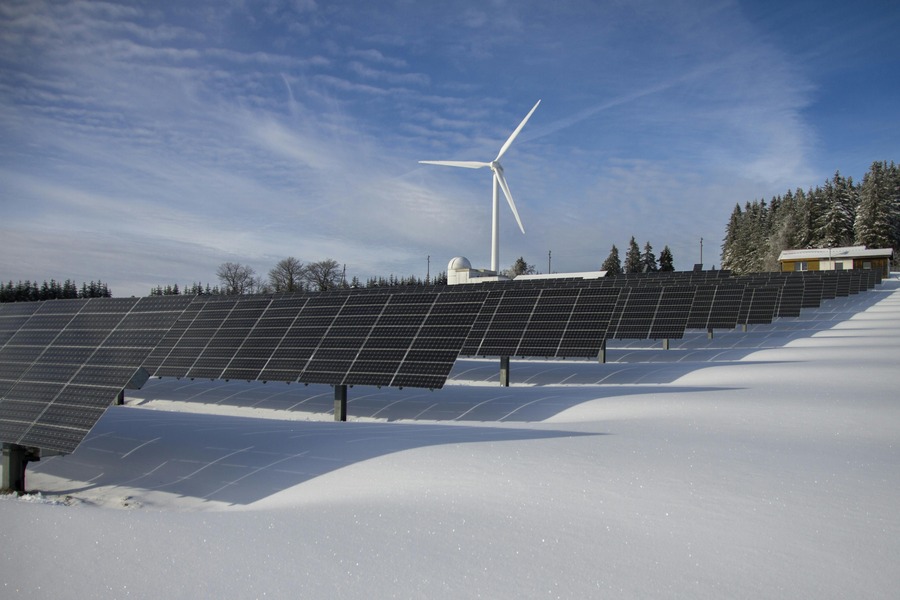
- The Need for Cheap Power: Profitable operations almost always have access to electricity significantly cheaper than typical residential rates (often below $0.05/kWh). This is why industrial miners locate near cheap hydroelectric, geothermal, solar, or wind power sources. Keep this context with the image below.
- PSU Quality: Don't compromise on the Power Supply Unit (PSU). A high-quality, efficient PSU (rated 80+ Gold, Platinum, or Titanium) minimizes wasted electricity (reducing costs) and provides stable power, protecting your components. Ensure its wattage capacity comfortably exceeds your rig's total draw (add ~20% headroom). Consider dual PSUs for larger rigs.
- Power Stability: An Uninterruptible Power Supply (UPS) can protect your rig from power surges or outages, preventing hardware damage and downtime.
3. Choosing What to Mine: GPU vs. ASIC Algorithms
Your hardware choice depends entirely on the cryptocurrency you intend to mine:
- ASIC Mining: Coins like Bitcoin (SHA-256 algorithm) or Litecoin (Scrypt) are dominated by ASICs. These are expensive, single-purpose machines offering vastly superior performance for their specific algorithm but cannot mine other types of coins.
- GPU Mining: Many Altcoins are designed to be "ASIC-resistant," making them suitable for mining with consumer Graphics Processing Units (GPUs). Examples include coins using algorithms like Etchash (Ethereum Classic), KAWPOW (Ravencoin), Autolykos (Ergo), and others. This guide primarily focuses on building GPU rigs.
- Research is Key: Before building, identify which GPU-minable coins are potentially profitable given your specific hardware plans and electricity cost. Check resources like WhatToMine.com (use with caution, data fluctuates) and research the long-term prospects of any coin you consider mining.
Core Components of a GPU Mining Rig
Here’s a breakdown of the parts needed for a typical GPU-based mining rig:
| Part | Selection Considerations & Examples |
|---|---|
| Motherboard | Needs sufficient PCIe slots for your desired number of GPUs. Mining-specific boards (e.g., from ASUS, MSI, BIOSTAR) offer more slots but standard boards can work for smaller rigs. Check CPU socket compatibility. |
| CPU (Processor) | Generally, a low-end to mid-range CPU is sufficient for GPU mining, as it doesn't perform the primary hashing work. Must match the motherboard socket (e.g., Intel LGA1700, AMD AM4/AM5). |
| RAM (Memory) | 8GB of DDR4 or DDR5 (depending on motherboard) is typically adequate for most mining operating systems and software. |
| Storage | An SSD (SATA or NVMe, 120GB+) is recommended for installing the OS and mining software for reliability and speed. A high-quality USB drive (16GB+) can suffice for dedicated mining OS like HiveOS or RaveOS. |
| GPU(s) | The core component for GPU mining. Choice depends heavily on target algorithm, hashrate, power consumption (efficiency!), VRAM amount, cost, and availability. Research current benchmarks for coins you plan to mine. |
| PSU (Power Supply) | High-quality (80+ Gold or higher rated), sufficient wattage for all components (GPUs are the biggest draw) + 20% headroom. Modular PSUs help with cable management. May need two PSUs for rigs with many GPUs. |
| PCIe Risers | Connect GPUs to motherboard PCIe slots while allowing spacing for airflow. Typically USB-based. Crucially, power risers directly via 6-pin PCIe power cables from the PSU; AVOID using SATA-to-PCIe power adapters, as they are a known fire hazard. |
| Mining Rig Frame | An open-air frame (metal or wood, DIY or purchased) is standard for mounting components and maximizing airflow/cooling for multiple GPUs. |
| Cooling Fans | Additional case fans (120mm or 140mm) are usually necessary to ensure adequate airflow across the GPUs and motherboard components in an open-air frame. |
| Cabling & Adapters | Ensure you have all necessary power cables (PCIe 6+2 pin for GPUs and risers, CPU power, motherboard power, SATA power for SSD), motherboard standoffs, screws, zip ties for cable management. |
Additional Requirements:
- Operating System: Windows 10/11 or a specialized Linux-based mining OS (e.g., HiveOS, RaveOS, Minerstat).
- Mining Software: Specific software client for the coin/algorithm you plan to mine (e.g., T-Rex, Gminer, lolMiner, NBminer for various GPU algorithms).
- Crypto Wallet: A secure wallet address compatible with the coin you are mining to receive your earnings. See How To Store Crypto.
- Stable Internet Connection: A reliable, low-latency connection (wired Ethernet preferred over Wi-Fi).
- Monitor & Keyboard/Mouse: Needed for initial setup and troubleshooting (can often be managed remotely afterward via software).
Building the Rig: Step-by-Step Assembly
(Ensure you work in a static-free environment. Ground yourself frequently.)
- Prepare Motherboard: Install the CPU onto the motherboard socket (align arrows/notches carefully, secure the lever). Apply thermal paste. Attach the CPU cooler and plug its fan into the motherboard's CPU_FAN header. Install the RAM module(s) into the appropriate slots (they click into place).
- Mount Motherboard: Secure the motherboard onto the mining frame using standoffs and screws. Ensure no part of the motherboard's underside directly touches the metal frame except at the designated mounting points.
- Install Storage: Connect the SSD (SATA data cable to motherboard, SATA power cable from PSU) or insert the NVMe drive into the M.2 slot. If using a USB drive for the OS, prepare it later during software setup.
- Mount PSU(s): Secure the Power Supply Unit(s) to the frame. Connect the main 24-pin ATX power cable and the 4+4 or 8-pin CPU power cable(s) to the motherboard.
- Install Risers & GPUs:
- Plug the small PCIe x1 end of each riser card into a PCIe slot on the motherboard.
- Mount the GPUs securely onto the top rack(s) of the frame, leaving space between them for airflow.
- Connect the larger PCIe x16 part of the riser to each GPU.
- Connect the USB cable between the x1 and x16 parts of each riser assembly.
- Power the Risers Safely: Connect a dedicated 6-pin PCIe power cable from the PSU to the power input on each riser card. DO NOT use SATA power adapters for risers or GPUs – this is a serious fire risk.
- Power the GPUs: Connect the required 6+2 pin PCIe power cables from the PSU directly to each GPU. High-end GPUs may require multiple connectors.
- Install Cooling Fans: Mount additional case fans onto the frame, directing airflow across the GPUs and components. Connect fans to motherboard fan headers or a separate fan controller.
- Cable Management: Neatly route and secure cables using zip ties. Ensure cables don't obstruct airflow or fan blades.
- Initial Boot & BIOS Setup: Connect a monitor, keyboard, and mouse. Power on the rig and enter the motherboard BIOS/UEFI (usually by pressing DEL or F2). Configure necessary settings for mining, such as enabling "Above 4G Decoding" (if available and using many GPUs), setting the primary display output, and ensuring all PCIe slots are recognized. Save changes and exit.
Software Setup and Optimization
Hardware assembly is only half the battle.
- Install Operating System: Install your chosen OS (Windows or a Mining OS like HiveOS) onto your SSD or prepare your bootable USB Mining OS drive.
- Install GPU Drivers: Install the correct and stable graphics drivers for your specific GPUs (Nvidia or AMD). Sometimes specific driver versions work best for mining certain algorithms.
- Install Mining Software: Download and configure your chosen mining software client. You'll typically need to edit a configuration file or script to input your wallet address, the mining pool server address and port, and potentially worker name/password.
- Join a Mining Pool: Select a reputable mining pool for your chosen coin. Consider factors like fee percentage, payout threshold, server location (choose one close to you for lower latency), and payout method (e.g., PPS+, PPLNS). Configure your mining software with the pool's details.
- Overclocking / Undervolting (Optional but Recommended): Use tools like MSI Afterburner (Windows) or the built-in features of mining OSes to adjust GPU core clock, memory clock, and power limit settings. The goal is typically to undervolt (reduce power consumption) while maintaining or slightly adjusting clocks to find the optimal balance between hashrate (performance) and energy efficiency (lower J/TH). Proceed cautiously, as incorrect settings can cause instability or even damage hardware. Test settings thoroughly.
Ongoing Operation and Maintenance
- Monitoring: Use your mining software or OS dashboard to constantly monitor GPU temperatures, fan speeds, hashrates, and power consumption. Ensure temps stay within safe limits (usually below 70-75°C for the core, check VRAM temps too).
- Cooling & Ventilation: Ensure your rig has adequate, unobstructed airflow. Maintain a cool ambient room temperature if possible. Consider venting hot air outside.
- Stability: Aim for a stable system that runs 24/7 without crashing. Instability often points to overly aggressive overclocks/undervolts or insufficient power/cooling.
- Updates: Keep mining software, GPU drivers, and the OS updated for performance improvements, new features, and security patches (but test updates before deploying widely if running multiple rigs).
- Cleaning: Regularly power down and clean dust from fans, heatsinks, and components to maintain optimal cooling performance.

Alternatives to Building Your Own Rig
If the process seems too complex or costly:
- Cloud Mining: Renting hashing power from a remote data center. Exercise extreme caution: This sector is notorious for scams, Ponzi schemes, and unprofitable contracts with hidden fees. Thoroughly vet any provider's reputation, transparency, and contract terms before investing. Independent verification is difficult.
- Buying ASICs: For mining Bitcoin or other ASIC-dominant coins, purchasing a dedicated ASIC machine is necessary. This involves high upfront costs and dealing with specialized hardware vendors.
Final Thoughts: A Rewarding Challenge
Building and operating a cryptocurrency mining rig is a significant undertaking that blends hardware knowledge, software configuration, and economic calculation. While the allure of generating crypto exists, profitability is far from guaranteed, especially for home miners facing residential electricity rates and fierce network competition. The initial investment can be substantial, and constant monitoring and optimization are required.
However, for those fascinated by blockchain technology, hardware tinkering, and performance optimization, building a rig offers an unparalleled hands-on learning experience. You'll gain deep insights into how Proof-of-Work networks function, the economics driving network security, and the interplay between hardware, software, and energy consumption. Approach it as an educational project or a serious business endeavor requiring careful financial planning, rather than a get-rich-quick scheme. If you embark on this journey, research diligently, prioritize safety (especially with power), monitor your results closely, and be prepared to adapt to the ever-evolving crypto landscape. Good luck!